Showing posts with label Guest Posts. Show all posts

Friday, June 3, 2011

Make a set of "Dinosaurs A to Z" alphabet cards!

On my birthday, this post was the featured guest post over on "I can teach my child", which is a fantastic site for getting all sorts of kid-activity ideas! It was great to share our dinosaur alphabet cards with Jenae's readers, so now I'd like to share with you (in case you missed the post on her site)!
For the past two years or so, one of Big Brother's favorite things is dinosaurs! In fact, the picture is from his dinosaur birthday party last year (with 5-day old Little Brother)! Given this love of dinosaurs, it probably comes as no surprise that he LOVES the PBS Show, "Dinosaur Train". 
Since we've been working on learning all the letters, we were quite excited to see an episode with a "Dinosaurs A to Z" song! Big Brother wanted to see the song part again, so an internet search led me to two things:
1. the full Dinosaur Train soundtrack on i-tunes (which is now his favorite thing to listen to in the car).
2. "Dinosaurs A to Z" lesson plans on pbs.org. There, you can watch the video clip and download free printable materials! 
I used the printables to make some dinosaur alphabet cards. Here's how:
- Print the materials (I printed 2 sets of the illustration pages).
 
- cut out the illustrations & dinosaur names and attach them to large index cards (I used mod podge over the pictures to make the cards a little sturdier & to prevent the pictures from ripping off).
- let dry & cut apart the cards.

That gave us one nice set of dinosaur alphabet cards, but I decided to make a second set so we could do some matching activities. At this point, Big Brother has a pretty solid grasp on his capital letters, but needs more practice with lower case. So, for the second set...
- cut out the illustrations, cutting off the letters.
- paste the cut illustrations to large index cards.
- once dry, write in the lower case letters and the dinosaur names in lower case letters (not exactly "scientifically correct" to do so, but I'm more concerned about learning letters right now).
- then, cut the cards apart.
With these two sets of cards, there are various activities you can...
-sequence the cards in alphabetical order
 
 - scatter the cards and then find the upper & lower case matches or even play "memory".
Any way you use them should be great for reinforcing letter-learning and are sure to be a hit with your little dinosaur-lover! 

Do YOU have a little one who loves dinosaurs?

Monday, May 2, 2011

Surgery Follow-up, Guest Posts & Giveaways WrapUp

Thanks so much to those that prayed, emailed, and commented with well-wishes! The surgery was successful and after follow-up visits with both the surgeon and endocrinologist today, everything is good! (if you have no idea what I'm talking about, there's some info here) The incision, surprisingly, looks fantastic (Yay for no large neck scars!) and most importantly, the pathology report came back clean. No cancer, thank you God!

And, a BIG thank you to the wonderful ladies who shared posts here this past week! In case you missed any, here they are:
Fun Activities for Kids with Oopsey Daisy
Family Calendar (*giveaway) with Sweet Rose Studio
Spring Fruit Tart with Baked by Joanna 
Hoop Art with Hiya Luv
Kid Table Makeover with I Can't Stop Crafting 
Focus Points Photography Tip with Hoot Photography 
Cupcake Push Pops (*giveaway) with Pink Cake Plate Diaries
Mini Cheesecakes with I Heart Naptime

There are some fun giveaways going on around here too! They all end this week, so make sure you get entered! 
The Quirkles Book Giveaway (fantastic for little ones up to low elementary age)- ends 5/3
Family Calendar from Sweet Rose Studio- ends 5/5
Cupcake PushPop holders from Pink Cake Plate - ends 5/8

Look for new posts soon, starting with a yummy Cinco de Mayo recipe tomorrow! As always, thanks so much for reading!

Mini Cheesecake Tarts with I Heart Naptime

Hi friends! I’m Jamielyn from I {heart} nap time. Today I’m going to share with you one of my favorite little desserts.


Mini Cheesecake Tarts

Adapted from Our Best Bites

14 Nilla Wafer Cookies

2 8oz packages cream cheese

3/4 C sugar

2 Tbs flour

2 Tbs powdered sugar

1/4 tsp baking powder

1 Tbs fresh lemon juice

2 eggs

1 1/2 tsp vanilla

Foil cupcake liners

Optional Toppings:

canned pie filling

fresh berries

whipped cream

chocolate sauce

caramel sauce

lemon curd

Preheat the oven to 375. Soften cream cheese in microwave for 30 seconds if needed. With an electric mixer, beat cream cheese and sugar. Add in flour and baking powder and beat to combine. Then add in eggs, one at a time, lemon juice, and vanilla. Beat until combined.
Fill a muffin pan with cupcake liners and place two vanilla wafer at the bottom of each one. Divide batter between 12 muffin papers, filling each cup up to about 1/4 inch from the top. Bake for 15-18 minutes or until a toothpick comes out clean. They’ll puff way up during baking, but they’ll settle after being chilled.

Place them on a cooling rack and let them cool completely. While they cool, they will sink down in the center. Don’t worry- that’s normal! Before you top them, chill in the fridge for at least 4-6 hours. Then top and serve. I used a strawberry glaze and then put strawberries on top.
YUM.. now take a bite! :)
These are REALLY yummy! Oh and we did top them with whip cream as well… mmmm!

Thanks for having me Mom Endeavors fans!
-Jamielyn
Photobucket

Sunday, May 1, 2011

Cupcake Push Pops with Pink Cake Plate Diaries

Hey all you Mom Endeavor readers, I am so excited to be here today!!
I am Laura from Pink Cake Plate Diaries.
This is my first guest post so be gentle with me!!! LOL! I have only been semi-blogging for a few months!! I write about just any 'ol thing, but mostly crafts and baking/cooking!!
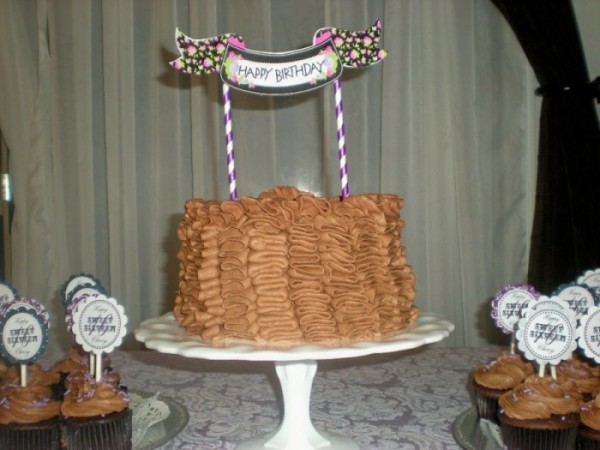
I made this birthday cake for my dear friend's daughter's Sweet 16 Birthday Party.
And here is another I made for a friend's father for his 88th Birthday!
 So as you might have guessed, today, I am going to show you how to make your own yummy treat!! They are the hottest ticket around the party scene and so easy you're gonna want to make some right now!!
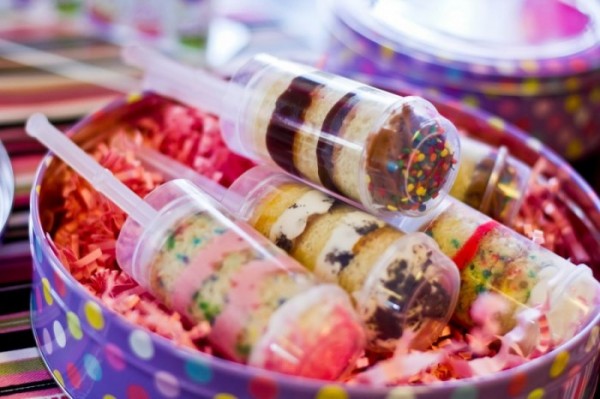
Have you seen these???
 Yup, cupcake push pops, cupcake shooters, push-pop cupcakes, cupcake shots, push cakes, cake shooters...or if you can think of a better name email me!!! HA!
So lets get started!! 
You can make these any flavors you like, I just happened to have a chocolate cake mix out so that's what I started with. I very rarely make a cake from scratch; I just "doctor" a cake mix. I'm like Sandra Lee-- a "semi-homemade" kinda gal.
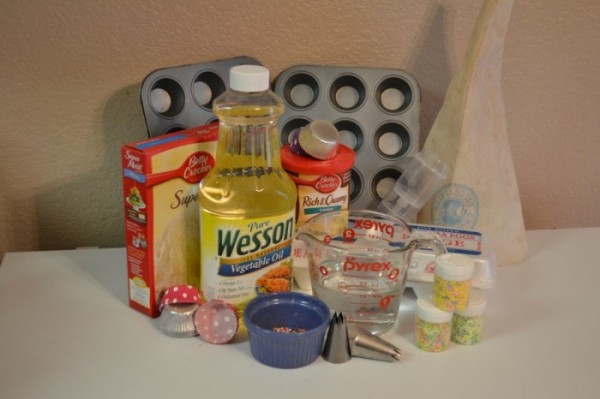
Here's the supplies:
 Mix up your favorite cake mix (or recipe) and make some mini cupcakes. Either use store bought frosting or mix up a batch of your yummiest recipe. (Just a quick word about tools of the trade!! You DO NOT need to have professional pastry chef tools to do this I just happen to have them because I am like that!! In place of the pastry bag and decorating tip you can put your frosting in a heavy duty ziplock bag and snip off a small piece of the corner! This works just as well!)
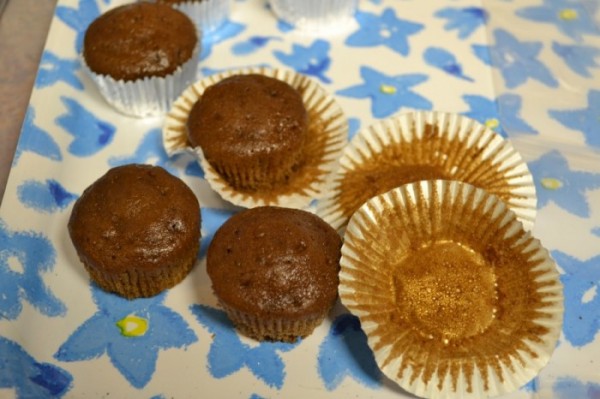
Start by removing the paper liner from the mini cupcakes. You will need 2 mini's for each cupcake push pop. And, normally I would do this "en mass"!
cupcakes
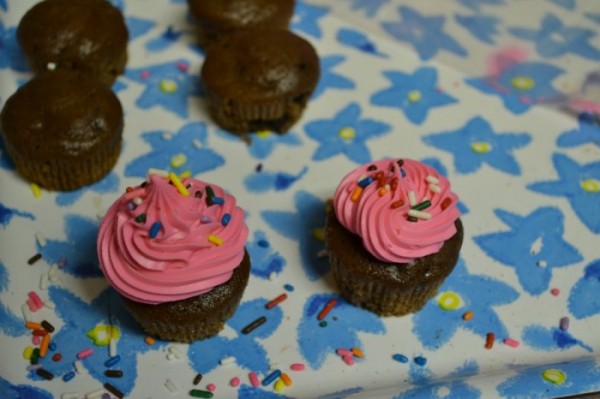
Go ahead and frost your yummy little mini cupcakes. Now don't they look cute?? Ok they need some sprinkles...that's better!! Everything is better with a few sprinkles on them!!!
cupcakes
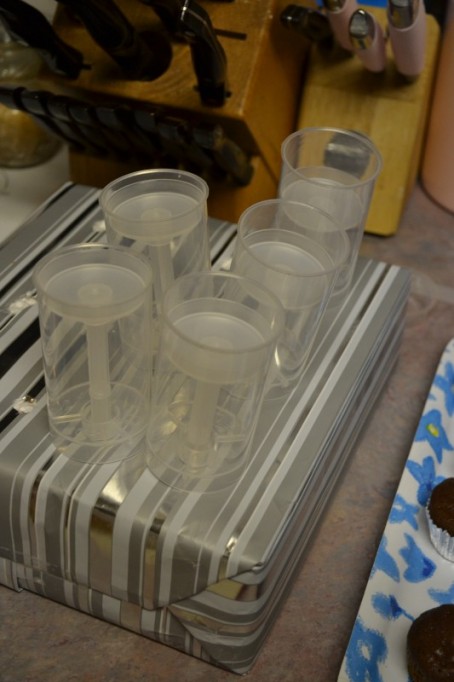
Ok, let's assemble the containers. Put the disk in the cylinder and then insert the handle in the bottom. Easy peasy!!
push pop holders
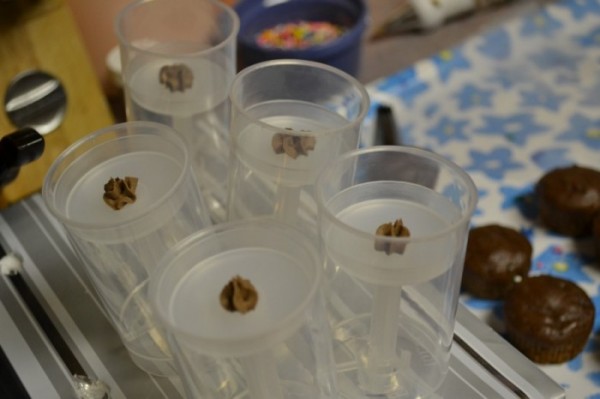
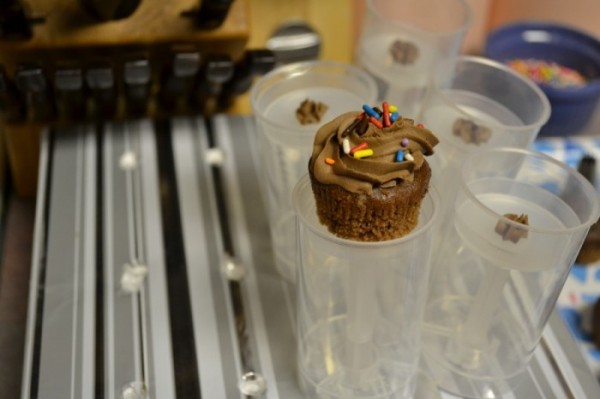
Push the disk to the top of the cylinder and put a small dollop of frosting on the disk (this is to keep the lil' darlin' secure!) Place your first mini cupcake on the disk and press gently so it sticks!
frosting
cupcake
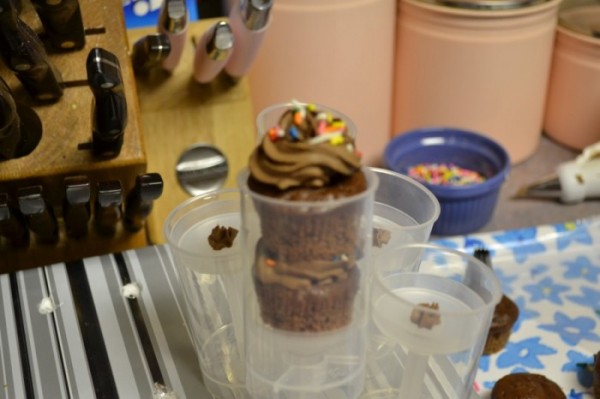
Pull down on the handle to make room for the next yummy cupcake to be placed on top!!
cupcake
 You can decorate the tops with whatever you like. I found these little yummy things at Wal-Mart today, so I am going to put one on top of one of these little beauties. So cute!!
candy
candy
candy
Now put the lid on!!
cupcake shooter, pushpop cupcake
OK were done!!! Adorable!!
I am going to doll these up a bit with some ribbon and stuff but you can decorate how you please!!
I actually made 3 with different colors!! If you want to see more pictures visit my site Pinkcakeplate.com.
And, here's a surprise for you!!! I'm giving away 1 dozen push pop containers so one of you wonderful readers can make your own Cupcake Shooters!!
 
TO ENTER:
1. Leave a comment telling us what you would make your cupcake push pops for.
Then, get extra entries (leave a separate comment for each):
2.  Follow Pink Cake Plate on Google Friend Connect. 
3. Follow Mom Endeavors on Google Friend Connect (see widget on the left side bar)
4. Like Mom Endeavors on facebook and/or on twitter
*Make SURE you leave your email or that your email is connected to your account. Sara can't contact to "no-reply" comments. Thanks! :)
(up to 5 entries per person)
Limited to US residents only. Giveaway will end on May 8th at 10pm PST. Winner with a valid entry will be selected at random using random.org. I will email the winner and they will have 48 hours to claim their prize (make sure you leave your email address or that it is attached to your profile).

It has been great being here thanks for the fun!!

Saturday, April 30, 2011

Focus Points Photography Tip with Hoot Photography

Hi, My name is Chrissy and I'm excited to be guest posting here on Mom Endeavors!  I have two blogs one Hoot Designs that's my go to everyday blog and my photography blog called Hoot Photography, it's new, and I post photo tips along with my own photo shoot photos. I'm going to share a tip on focus points and some cute wooden animals are starring in the photos.

Here we go~ All about the focus points within the viewfinder of your camera. When I look through my camera (I never use the digital screen to view the subject when taking photos) there are many dots in somewhat of a clock circle. For my Canon they are at 12, 1:30, 3, 4:30, 6, 7:30, 9, 10:30 and back to 12 noon. Each of these are focus points that can be manually set for each and every photo you take ~ I use this tool all the time.

Right out of the box your camera most likely was set on auto and what that means is your camera is making the best guess as to what “it” thinks you are trying to focus on in the picture, however, you are able to set this focus point manually. For my Camera a little red blinking light will light up as I gently push the shudder button showing where the main focus point is set. Using the buttons on the back of the camera I can move the red dot to any of those points and click set and that’s where the camera will focus, leaving the rest perhaps out of focus and maybe creating a great bokeh effect, depending on the photo being taken.

Below is what my screen or through the viewfinder looks like.
 
Here is a photo of the points of focus changing as I changed the focus point.  Everything is blurry because the objects are not on the same plane.  So if your subjects are not in a straight line across you will have some people in focus and some people out of focus, as shown below! And if the person you want to photograph is in the left position and your camera chooses right, or somewhere else, your person may be out of focus and you will be unhappy with your photo(s).

Here is a photo of all animals in a straight line and everyone is in focus weather I choose left center or right focus the reason for that is everything on the same plane, the camera sees as one.

 
Something else to try is looking through your viewfinder and with the focus on Manual (center) you then will move the camera around and get the center blinking light/focus point on your subject you want to "focus" on and gently press the shutter button this will lock the focus...keep holding the button.... and then reposition the camera to compose your shot and press down the rest of the way to take the picture.  That's how I took the flower photo, but notice, the non petaled flower is what is in focus.  With my focus point in the center I locked the focus on the spiky flower and then slightly pushed down the shutter button and moved the camera to the left to get the purple flower in the picture and clicked the rest of the way - it gave me the blur I wanted on the left with an off center focus point. This is often referred to as focusing and recomposing your shot.

I'm happy to answer any questions via the "contact me" on either of my blogs!!

Thank you again Sara!! 

Friday, April 29, 2011

Kid Table Makeover with I Can't Stop Crafting

 Hey there Mom Endeavors readers!  I'm Jen, the gal behind I Can't Stop Crafting.  I was asked to fill in here for the day, and I couldn't be more excited about it!  I really like reading Mom Endeavors, and am always interested in the great ideas and encouraging perspective Sara offers as a hands on mom.

A few months ago I came across this children's table at my local thrift store.  Seeing through the layers of caked on paint, the poorly laid "lattice" table top and the beat up wood, I saw a fantastic little table, perfect for tea parties, coloring, and crafts for my little ones.  And, for $3.00, what could go wrong?!
I started out by bringing it home and letting it sit in my basement for a few months.  Once that waiting period was over, I got right down to business.  I whipped out my circular sander and got to work sanding down that awful lattice pattern.  It's hard to tell in the pictures, but there was quite a ridge of dried paint along each of the crooked tape lines.  I sanded for a long time!  Once the table top, underside, and legs were all sanded down, I wiped them off with a clean rag.

Using plain old craft paint, I painted the legs and underside of the table a vibrant leaf green.
Once the legs were dry, I flipped the table over and painted the table top yellow.  Then my husband came home from work and asked why I was painting the kids table in John Deere colors.  Then I lightly sanded the yellow paint and painted it again, this time using a taupe-grey color that I had in the basement from a previous project.  Much better!

I have fond memories of listening to vinyl records at my Grandpa & Grandma's house as a child, one of my favorite songs being, "The More We Get Together".  This is a song I've taught my children and enjoy singing it with their little voices raising up with my own.  So, to personalize this table to our little family, I decided to paint, "Oh the more we get together the happier we'll be" on the tabletop.
Using some craft paper, I created a template for the table top.  I folded my paper into quarters, and cut it into an oval shape.  I secured the paper in the center of my tabletop using a little bit of painter's tape.
Following my paper oval as a guideline, I lightly penciled the words onto the tabletop.  You could easily use a stencil if you're planning on doing a similar project, or a Silhouette if you're so lucky as to have one of your own.

But, I had neither a stencil or a Silhouette on hand, so it was down to me and my handy pencil.  Once I'd gotten everything drawn on the way I wanted I used a little bit of the leaf green craft paint diluted with just a tiny bit of water and filled in the letters with a small paint brush.  I let the lettering dry, then did a second coat to add a little more contrast.
Once the lettering was dry, I felt the tabletop looked a little sparse, so I filled in a few areas with some freehanded green bubbles, clustering them together in groups.
After letting the table fully dry, I took some coarse sand paper and scuffed up my artwork and wiped the tabletop down with a clean, dry rag.
I felt like the tabletop still lacked dimension, so I dry brushed it with some watered down white paint.

To dry brush, you simply dip your paint brush in the paint, then on a clean piece of scrap paper or cardboard, brush off most of the paint.  Then you paint in long even strokes over whatever you're wanting to dry brush, giving it a weathered and worn appearance.

Then I highlighted my lettering just a little bit with the same green paint I used earlier, let it dry, and sprayed  the whole table with a layer of clear coat to protect all my hard work!
"he" is before highlighting, "ha" is after highlighting.  I added just enough paint to allow the lettering to pop through the dry brushing.

We had these little chairs given to us by some friends of ours.  Who can say no to a great freebie?!
To spruce them up I did one coat of watered down white paint, to give them a white washed appearance, and painted a few little green bubbles on the chair backs to finish them off.  A quick spray of clear coat and they were done in no time!
Phew!  Sorry if this all seems really complicated!  All in all the project didn't take too long, there were just lots of little steps.  My kids love sitting at their newly refurbished table, singing "Oh the more we get together" over cheese and crackers.
Thanks so much, Sara, for having me!  It was a pleasure being here.
I'd love for any and all of you Mom Endeavors readers to come visit me here at I Can't Stop Crafting.  I've  got some exciting plans coming up in the next weeks and would love to share them with all of you!

Be blessed,

Thursday, April 28, 2011

Hoop Art with Hiya Luv

Hiya Mom Endeavors readers! 
I am so excited to be visiting your corner of the internet today and feel so honored that Sara invited me to do so!!!

My name is Gina and I blog over at Hiya Luv and I also have a shop on etsy called Hiya Luv Handmade. I sew pretty accessories for all ages.
If you are on twitter, I enjoy chatting {@hiyaluv} and I host a twitter chat on Monday nights at 8pm eastern called #SetUpShop where we discuss the in's and out's to setting up a handmade shop! 
The more the merrier so stop on by if you get the chance!

***
So recently we converted our spare room into a crafty space for me. My sewing and craft supplies had begun to take over every nook and cranny in our house and so it was time to find a little space I could call my "crafty home." 

Now that the paint and carpet are done and I am slowly adding furniture, I need to add inspirational decor to the walls as well. My walls are a light gray and I have some yellow in my furniture. 
I also love the color pink and want to have that represented throughout the room also but I don't want it to over power the room. I thought it would be fun to create some hoop art for the walls.

Oh yes, I have fallen to the embroidery hoop bug that is going around!
I made this lovely felt flower piece not too long ago and wanted something that reflected my shop. 

So I made this:
{i heart sewing is by paint me a pic}
{silly owl hoop art, by me}

Supplies I used:
8inch hoop
felt
fabric
thread
needle
googley eyes
hot glue gun
ribbon

STEP ONE: 
The first thing I did was pick out the fabric I wanted for the background. 
I love the gray birdie fabric and thought it would go great with the pink.
I then chose my felt colors.
I traced an owl. Originally I only had one owl but then decided to make a second owl to be like my blog and shop header. 
I added a heart and my Blog name across the top.
I hot glued the felt onto the fabric but did so carefully because I knew I was going to outline some parts with embroidery.
I also added a bow to each owl. 
One has a bow tie and the other has a bow in her hair. 
I like bows.

STEP TWO:
To give the hoop art a more finished look, I tucked in the extra fabric on the back and hot glued it to the sides.

STEP THREE: 
I cut out a large circle of felt and hot glued it down on top of the embroidery stitches.
I wanted to keep the stitches secure and also hide short parts of the fabric that wouldn't stay down.

STEP FOUR: 
Hang up and Enjoy!

Other uses for this type of art-
baby nurseries
children's room
children's playroom
bathroom
your crafty space

Can you think of anywhere else? 

Thanks for visiting with me today and I hope to see you around!

:) Gina

Wednesday, April 27, 2011

Spring Fruit Tart with Baked by Joanna

Hi everyone! My name is Joanna and I have the pleasure of writing to you all today on Mom Endeavors thanks to Sara. I have a blog called Baked by Joanna that features recipes, party ideas, my baking and more...I like to think of it as my life journal.
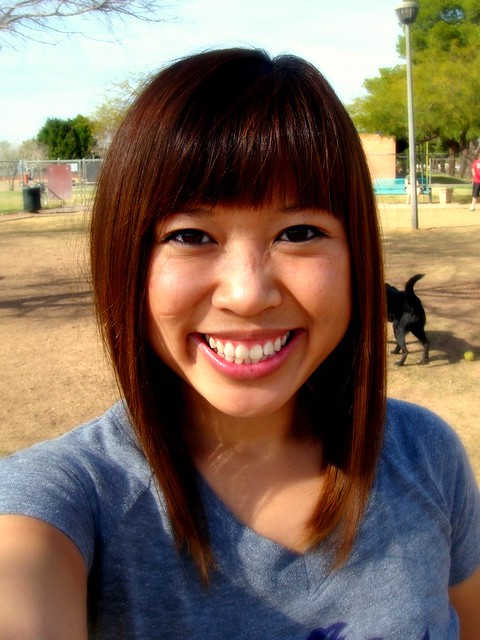
Joanna at the dog park
So who am I? I am a home baker that has a passion for food and entertaining. From weddings to fun treat bags, I like to do it all. Most of my party planning comes handy when I entertain at home.
Photobucket
I have a husband and two pups you see, so how can I not be overly enthusiastic when my hubby and I have guests over for a sports party or when we wish our pups another happiest of birthdays? And now, with all my friends having tiny tots of their own, I am secretly planning parties in my head that I want to bring to life. Exciting!
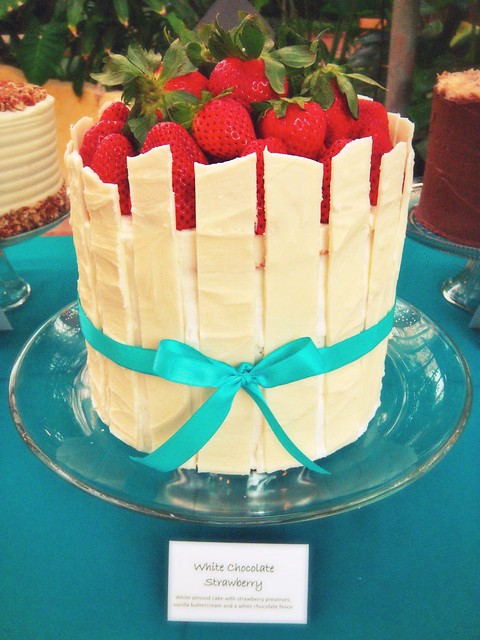
White Chocolate Strawberry Cake
Anyways, my dream of owning a bakery has developed into a dream of creating an event planning company that has a strong emphasis in food. My love for food collides with the world of parties and I would not be complete if I didn't have both. Perhaps one day it will happen. *positive thinking*

Well, enough about me. What do I have for you? A few party tips and a recipe to keep you busy this spring, of course!

Spring is about reviving your activities from indoor to outdoor and enjoying the company of friends and family. So here are a few tips and ideas to get your Spring activities going again:

-Dust off that patio set and add some fresh flowers, light snacks and lemonade and enjoy the afternoon with friends while catching up on all of life's happenings.
-BBQ - nothing says yummy and brings good company together like grilling out.
-Plan outdoor activities with your children to get them away from those pesky electronics. Try a picnic in the park, the local botanical garden or a bike ride to an art walk.
-Don't forget your pups! This is the best time of year to visit dog parks and mingle with all the other fluffy characters.
-Lastly, stop and smell the roses. Too often we let "busy" take over our lives and it's just as important to make time for yourself as it is to make that deadline. Dare I say, it is actually more important. Enjoy life and yourself.

Now, to give you that entertaining edge, here is a delish recipe that I created just for you. The best part is that you can change the fruits you use to match different seasons. :)
Photobucket

Spring Fruit Tart

Serves 6

Ingredients
1 cup all-purpose flour, plus extra for dusting
1/4 tsp salt
1/4 cup shortening
1/3 cup ice cold water
1 large banana, sliced 1/4" thick
1 cup strawberries, thinly sliced
1 pinch ground nutmeg
1/2 tsp ground cinnamon
1/3 cup blueberries, fresh or frozen
zest of 1 lemon
1 tbsp unsalted butter, melted
2 tsp sugar

Directions
Preheat the oven to 425 degrees F.

In a bowl, using your hands, mix the flour, salt, shortening and water together until a ball of dough is formed. Be careful to not overwork the dough, and add additional flour or water as needed. Place the dough on a floured piece of parchment paper. Roll the dough on the paper to approximately a 12-inch round.

In the center of the dough, layer the bananas making sure to leave 1 1/2 inches of the dough uncovered from the edges. Now layer the strawberries over the bananas and dust with the nutmeg and cinnamon. Scatter the blueberries and lemon zest over the strawberries.

Begin folding the edges of the dough in to form a crust. Brush the crust with the butter and sprinkle sugar over the entirety of the tart.

Place the tart and parchment paper on a cookie sheet and bake in the oven for 35 minutes or until the tart's crust is golden brown. When baking is done, cool the tart on a rack before slicing.
Photobucket
Now serve and be the talk of all your friends. :)

I hope you get to enjoy this recipe, and don't forget to stop by Baked by Joanna for more recipes and entertaining tips. Thanks for having me on Mom Endeavors!
Related Posts with Thumbnails